IÔÇÖve embarked on the journey to be Awesome with little more than a bucket load of enthusiasm and a handful of friends who know how to do cool things. Some have been more complicated than others. One of the problems with attempts to be Awesome is that people expect the things that you try to be particularly impressive.
For example, I read an article on the BBC news website about Dmitri Galitzine last week, a self-described vegetable artist who crossed the Solent in a boat made of two oversized pumpkins. Godzilla pumpkins. Who knew? Apparently there are a group of people around the world who race in genetically-modified pumpkins. If you donÔÇÖt believe me, Google ÔÇ£pumpkin boatsÔÇØ to find out a little bit more.
IÔÇÖve always been one to jump on a bandwagon (or boat depending on whether youÔÇÖre friends with Dmitri or not), but unfortunately lack the ability to acquire such massive specimens of the vegetable variety.
Finding normal pumpkins this time of year is usually hard enough. So, I decided to settle on something a little bit smaller and simpler. Nothing says, ÔÇ£Hey guys itÔÇÖs Halloween,ÔÇØ than carving up vegetables and stuffing them with tealights. Having never tried to carve a pumpkin before, I thought that I could give pumpkin carving a go.
Thus transpired one of the more spontaneous ways to be awesome that IÔÇÖve come up with, and I was joined by Elliot, Becky, and gair rhyddÔÇÖs own Tom Eden. If youÔÇÖre bitterly disappointed about the fact that I didnÔÇÖt acquire a giant pumpkin and went on an intrepid journey down the Taff with it, then I guess thereÔÇÖs always next year.
Dmitri, if youÔÇÖre reading this, get in touch.
How to carve a pumpkin in five easy steps:
1. Acquire a Pumpkin.
After a comprehensive search around CardiffÔÇÖs finest supermarkets, I finally located three pumpkins which were slightly on the small side. Walking down the road a little bit later with a shopping bag containing the game Articulate (IÔÇÖm mildly addicted to this at the moment, so planned on playing it) and three knives, I felt both eloquent and dangerous. Once you reach this stage, youÔÇÖre certainly ready to carve up some shapes.
2. Scoop out the Flesh
This is the part where you slice a hole in the top of your pumpkin. Traditionally, this is done at the top of the pumpkin. I used a zig-zag pattern at the top of my pumpkin, which made it easy to take off the ÔÇ£lidÔÇØ without breaking it.
3. Design, go crazy you fabulous Picasso you!
Websites like Pinterest are amazing for things like this, albeit both beautiful and intimidating. You can find ridiculously cool pumpkins, in the shape of Disney characters, kaleidoscopic patterns, and even lifelike sculptures (yes, pumpkin carving is kind of a big deal these days).
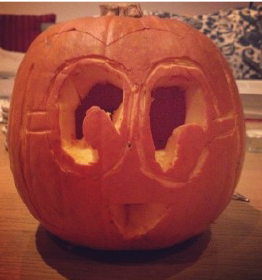
Now, as you may already know, attempts at imitating Pinterest can go one way or the other. In spite of our best intentions, our enthusiastic crafty endeavors often end in failure. Some people find it easier to get a design from a paper transfer in order to make their pumpkin pretty. I drew my Minion directly onto the pumpkin using a pencil, and hoped for the best. If you squint and turn your head to the side a little, you may just see the resemblance.
4. Carve the Features
Now that you have a template, carve along the pattern with a small knife.┬á A handy internet-based tip for making the exposed areas of your pumpkinÔÇÖs flesh from turning brown is to apply a film of Vaseline. This means that your pumpkin stays a little bit nicer for longer.
5. Light
To illuminate your pumpkin, one of the easiest ways is to put a tea-light inside it. Voilà! There you have it. Your pumpkin lantern of joyfulness.
Jess McFarlane


Add Comment